.png?height=120&name=rockcontent-branco%20(1).png)
As an Administrator, you can give your colleagues access to the platform, and determine each user's permission role. Your contract with Live will determine how many users can be added to your account.
- Add New Users
- Set Permission Roles
- Change a User’s Username
- Add User Categories
- Add, Change or Remove a User Avatar
- Lock or Unlock a User’s Avatar
- Delete a User
- Navigation
Dashboard > Admin > Manage Users
Permission Level
Administrator
Add New Users
Note:
Administrators are the only users with permission to add users and modify user permission levels.
Non-administrators can add a user by sending a Guest Writer invite. For more information on inviting Guest Writers to your stream, click here.
Administrators will add users to the Live account on the Manage Users page.
To get to the Manage Users page, click Settings > Manage Users on the left navigation bar. Alternatively, from within a stream, click Menu > Users > Invite at the top of the page.
To invite a new user from the Manage Users page:
1. Enter the email address of the user you would like to add to your account in the Add User(s) field. If adding multiple users, separate your users’ email addresses by commas.
2. Click the Add User(s) button. The invited users will be sent an email prompting them to verify their email addresses and set up a Live profile.
3. The invited user's profile will appear on the right side of the page, allowing you to easily set his or her permission role.
Note: The "User has not activated the account" message will be displayed until the new user clicks the link in the invitation email.
Set Permission Roles
Once a user has been added successfully to your account, a profile window will appear on the right side of your screen, prompting you to set the user’s role. Use the Role drop-down list to select the users’ role. Consult this chart to understand what each role can do in the platform.
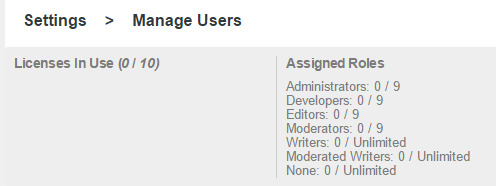
Note: A user’s role can be changed at any time by using the Role drop-down menu to select a different role from the Manage Users page.

To help you to track how many users have been assigned to each role, you can consult the Assigned Roles summary at the top of the Manage Users page.
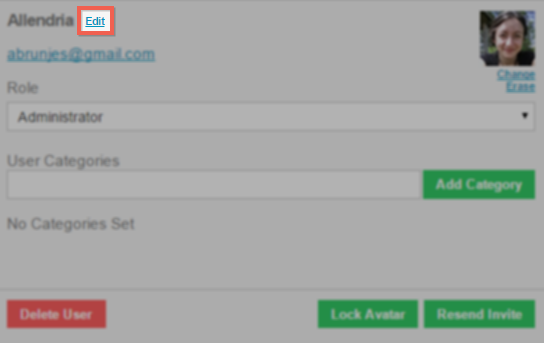
Change a User’s Username
When adding a new user, by default, everything before the @ of the email address will be a user’s username. You can change a user’s username by clicking the Edit link next to the username.
Note: The first time a user logs into Live, he or she will have the opportunity to change their username.
Add User Categories
You can also assign a user to a Category (e.g., “Marketing,” “Social Media,” “Communications,” etc.) to help organize your users when inviting collaborators to your streams.
Click the Add Category button, to add a user category to your account.

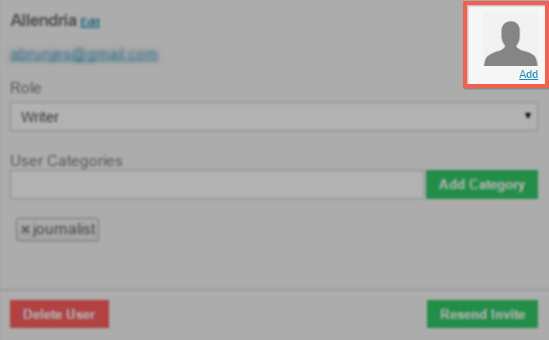
Add, Change or Remove a User Avatar
If you would like to add an avatar to your new user, click the Add link below the placeholder avatar. You can change or remove a user’s avatar at any given time by clicking on the Change or Erase links below the User’s Avatar.
Note: Once a new user has logged in, they also have the ability to change or erase their avatar. The optimal image size that can be uploaded is 50x50px.
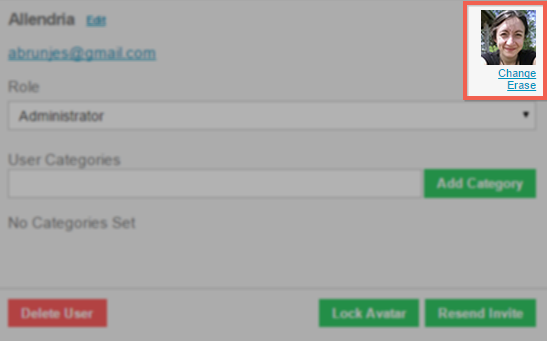
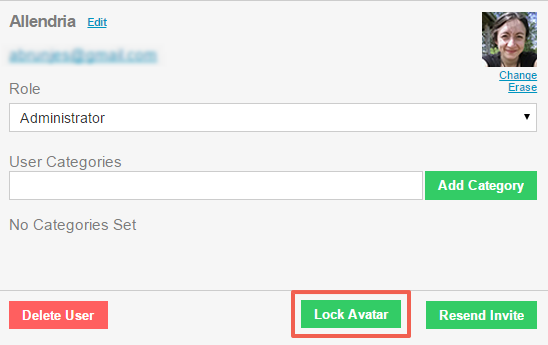
Lock or Unlock a User’s Avatar
Locking a user’s avatar prevents them from changing their own avatar. This can be useful if you would like to enforce a company standard of avatars. To do this, locate the user in the All Users list, and click on the Lock Avatar button. You can always unlock a user’s avatar by clicking on the Unlock Avatar button.
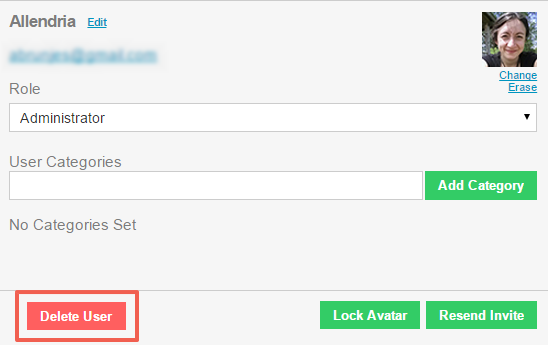
Delete a User
To delete a user, select the username in the All Users list, and click on the Delete User button.
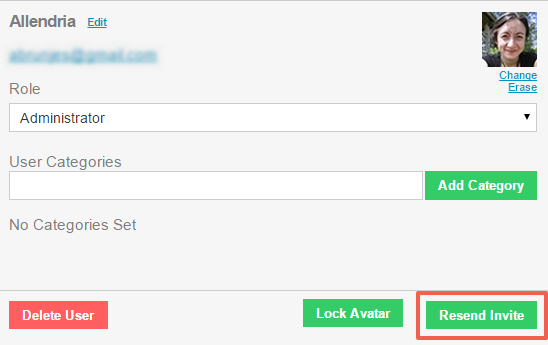
Resend an Invite to a User
If a new user has not received an invite email or it was accidentally deleted as spam, an Administrator can resend the invite email by clicking on the Resend Invite button on the Manage Users page.
Note: Administrators will be able to see if a user's account has been activated.